우리는 누구일까요?
Fox Renderfarm은 업계 최고의 클라우드 렌더링 서비스 제공업체로서 귀하의 창의적인 프로젝트를 위한 고품질, 안정적이고 비용 효율적인 솔루션을 제공합니다. 2011년부터 Fox Renderfarm은 뛰어난 성능, 고객 만족, 유연한 가격 체계로 확고한 명성을 쌓아왔습니다.
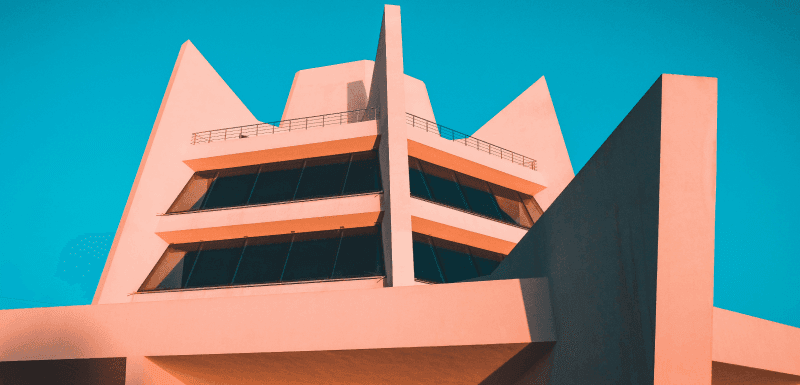
Created by Lomas Post Software used: maya 2018


최고의 Maya 렌더 팜
강력한
- 수천 개의 렌더링 노드를 사용가능
- 최대 360Gbps 스토리지 처리량.
- CPU & GPU 렌더링 둘 다 사용가능
- IT 환경 자동적으로 감지 및 클라우드 인프라구조 서비스 매칭.
합리적 가격
- 모든 새로운 등록에 대한 $ 25 무료 렌더링 크레딧.
- 코어 시간당 최저 $0.0306입니다.
- 다이아몬드 고객에 대한 최대 50% 할인 할인.
- 교사는 교육 가격을 사용할 수 있습니다 학생과 교육 기관.
안전한
- TPN 인증 공급 업체.
- ISO27001 준수
- 독점 프로토콜을 통한 안전한 데이터 전송.
- 은행 보안 수준 데이터 센터.
신뢰성
- 다수의 수상 경력이 있는 팀의 파트너.
- 수년간의 할리우드 수준의 제작 경험으로
- 연중 무휴 실시간 고객 관리 및 기술 지원.
- 고 가용성, 대기 불필요.
Maya 의 폭스 렌더팜 클라우드 렌더링 단계
렌더링을 완료하는 데 단 4스텝이 필요합니다.
스텝 1
가입
계정을 만들어주시면, $25의 무료 렌더 쿠폰을 환영 선물로 드립니다. 이 쿠폰을 이용하여 여러분의 창의적인 프로젝트에 저희 멋진 클라우드 렌더링 서비스를 이용해보세요.
스텝 2
프로젝트 업로드
Fox Renderfarm의 웹 버전에 로그인하여 프로젝트를 업로드해보세요.
스텝 3
렌더링
시스템이 자동으로 귀하의 프로젝트를 분석하고 렌더링합니다.
스텝 4
프로젝트 다운로드
간단한 클릭으로 렌더링된 프레임을 다운로드해보세요.
Maya 렌더 팜 사용 안내서


폭스 렌더팜 뉴스 센터
2025-04-24
From Modeling to Presentation: Mastering Architectural Animation
Architectural animation is an efficient technique that can turn building plans into interactive previews. Instead of just looking at flat drawings, you can show how a building will look and feel in motion. This technique is widely used in real estate and construction to showcase projects in an engaging way. It makes it easier to spot problems, share ideas, and get everyone on the same page before construction begins.In this article, we will explain what architectural animation is and how it works. You will learn about the steps involved in creating a 3D architectural animation. The guide will also share tips on how to make the rendering process faster and more efficient. Finally, you will get to know about some popular software used for architectural animation and the key benefits of using this technology.Part 1. What is Architectural Animation?The virtual representation of a building or house in motion is known as architectural animation. With the help of 3D modeling techniques, users can create videos that show how a structure will look from different angles. A client or an architect can visualize how the product will look even before the start of construction. They can include realistic textures and even people to make the scene more lifelike.The process starts with creating a 3D model and ends with presenting the final design to the clients. Unlike photos that show a frozen moment, animations let you move through the design naturally. They are used in marketing and project approvals to communicate design ideas effectively. This is the reason it has become vital in modern architecture and real estate development.Part 2. 3D Architectural Animation Process at a GlanceAfter learning the basic concept, this section will break down the process into simple steps. Here is a brief overview of the major steps involved in the process of architectural 3D animation:1. ProjectThe first step is to understand the project and gather important information about the building that can be used. This includes details like floor plans and the materials involved in the assignment. The designer also needs to know the purpose of the animation and the target audience for whom the project is being created. It is important to have clear communication at this step of architectural visualization animation to ensure the results meet the client's expectations.After the scope of the project is known, a storyboard is created to outline camera movements and transitions. This helps visualize the final animation before the architects can get on with the project. It is important to properly plan the task at this stage to avoid costly revisions later.2. ModelingIn this step, the three-dimensional illustration of the building is created with the help of software like Blender. The model includes walls and other structural elements that can be added. Moreover, the accuracy of the model is vital because any mistakes at this stage will affect the entire architectural 3d animation. Beyond just the building, additional details are incorporated to add to the realism of the design. In addition, furniture, interior decor, and neighboring buildings are added to the scene. However, artists must optimize the model by avoiding overly complex geometry to avoid slowness. A thoroughly constructed 3D model acts as the foundation and ensures proper settings.3. TexturingIt is the process of applying surface materials to the 3D model to make it look closer to being real. Artists use wood grain or brick patterns, which are high-resolution images. Then, they adjust parameters such as roughness and bump mapping to imitate real-world materials. For example, glass should appear transparent, and concrete should look rough. Moreover, proper texturing adds depth and authenticity to architectural animations.Walls may have plaster textures, and the floors could be tiled, as different materials are assigned to various parts of the scene. High-quality textures improve visual appeal, but they must be adjusted to avoid excessive rendering times. UV mapping is often used to ensure textures align correctly on 3D surfaces. 4. LightingIn setting the mood and realism of the architectural animation, lighting plays a necessary role. Artists use natural lighting and artificial sources to copy real-world conditions. Moreover, details such as the direction and intensity of the light are adjusted carefully. They may use warm lighting for cozy interiors and bright daylight for office spaces. Since proper lighting improves the textures of the project, it adds depth to the project's design. Furthermore, shadows and reflections must also be fine-tuned to bring a lifelike effect. Techniques like ray tracing are also used that improve shadow accuracy. Poor lighting can make even a well-modeled scene look flat or unnatural. This step is paramount for creating an engaging and visually appealing animation.5. AnimationArchitects can create stuff like a dynamic walkthrough or flyover of the building by animating the camera. In this phase, smooth camera movements like pans and tracking shots guide the viewer through key areas. The architectural 3D animation also includes moving elements like elevators and sliding doors to add realism. Plus, the transition and timing must feel natural, as abrupt movements can make the scene look robotic.Artists use keyframe animation to define start and end points, and software inserts the motion in between. In addition, they can add stuff like people walking or cars driving by. It is done to make viewers feel as if they are physically present.6. RenderingThis is the step where all elements of the project are used to create the final video file. It is the most computationally intensive step of the process, as the software needs to calculate multiple things for every frame. As a result, the high-resolution architectural visualization animation with complex effects can take hours or even days to render on a single computer.To speed up this process, professionals can use cloud render farm services like Fox Renderfarm. This service distributes the workload across hundreds of servers to take the burden off your computer. It can reduce render times from days to hours and supports popular software like Blender.7. Post-ProcessingThe raw rendered video is refined using tools such as Adobe After Effects for architectural animations. In this step, color corrections standardize brightness and saturation throughout the design. Effects like lens flares add a cinematic quality, and the layered sound design featuring ambient noise or music elevates the result. This step also fixes minor issues like flickering lights that can disturb the overall look of the video.Some animations include text overlays, and the final output is exported in popular formats like MP4, which is suitable for everywhere use. In short, this step polishes the animation and gives it a professional touch.8. PresentationAs the project is completed, it is shared with investors and clients through various formats. Video files are generally used for online uploads, while VR headsets can be used for interactive walkthroughs. Feedback from clients may require minor tweaks, like the camera angle, before they finally approve it. When an artist presents an architectural animation nicely, it helps the clients visualize the project clearly.A good presentation allows the investors to make informed and quick decisions about the project. These appealing visuals are a great marketing tool for real estate developers to attract potential buyers.Pro Tips: Improve 3D Animation Rendering EfficiencyArchitectural visualization animation can be so demanding on local hardware, as it deals with detailed lighting and realistic physics simulations. As a result, the computer may cause delays and take a long time to render these designs. To avoid such delays, artists can use the cloud rendering service of Fox Renderfarm. The platform supports all major software, like Maya and Cinema 4D, that you may need for such projects.Moreover, it has powerful SSD storage drives, so you can access your data without any kind of delay. This render farm service can be used on different operating systems, like Windows, macOS, and Linux. Apart from this, the artists can switch between GPU and CPU rendering as per the needs of the project. It also sends powerful rendering nodes to process complex scenes efficiently and quickly.Key FeaturesData Security: This service is ISO27001 certified and keeps the privacy of the artists as its top priority. Moreover, it is a Trusted Partner Network (TPN) accredited vendor, which confirms its user-centered approach.Premium Support: As the tool has a dedicated support team, it responds within 15 minutes. Furthermore, contacting them is as simple as you can contact them via WhatsApp or a simple Email.Pipeline Integration: With its APIs, you can effortlessly link this service to your production pipeline. It will help you to automate tasks like uploading projects and accessing rendered files.Fastest Speed: Since it is equipped with Raysync's technology, it significantly improves file uploads and downloads. This feature ensures the data is transferred at a fast speed for seamless workflow efficiency.Part 3. Popular 3D Architectural Animation Software TodayNow that you know about an efficient cloud rendering service, this section will discuss the software options available for creating architectural animations:1. Autodesk 3ds MaxA powerhouse for architectural visualization animation, Autodesk 3ds Max offers advanced modeling tools like parameter arrays and procedural generation. It also comes with an integrated Arnold engine that is used to render complex scenes and designs. Additionally, its robust modifier stack allows non-destructive editing, perfect for iterative design changes. As the software supports multiple formats, such as USD, FBX, and CAD, it allows you to share your designs with anyone.2. BlenderThis open-source software is ideal for small studios, as it comes with a complete modeling toolkit and Boolean operations. Blender offers multiple rendering options, and you can switch between GPU and CPU rendering. Additionally, its cycle engine comes with support for Virtual Reality rendering, which is great for architectural 3D animation. The software allows support for Planar Tracking Tripod solvers as it includes a production-ready camera.3. SketchUp ProSketchUp Pro’s intuitive push-pull modeling revolutionizes conceptual design and enables rapid massing studies and facade development. Since it uses V-Ray technology, it can help you create photorealistic architectural animations. Moreover, you can directly import Revit files into this software with just a few clicks. With the latest IFC improvements, you can enjoy upgraded transitions and minimize the risk of data loss and manual work.4. Cinema 4DIts MoGraph tools improve the architectural visualization animation with the help of facades and interior elements. Cinema 4D has Voronoi fracturing that allows you to shatter the object into different small fragments. Moreover, an artist can create complex models by adding or subtracting shapes with the power of OpenVDB. With its poly pen, they can create and delete surfaces comfortably without changing the tool.5. Unreal EngineSince this architectural animation software comes with Nanite technology, it handles billions of polygons easily. The MetaHuman Creator integrates photorealistic digital humans into architectural walkthroughs. For VR presentations, Unreal Engine delivers unparalleled immersion with 90+ FPS performance. The software has a Movie Render Queue feature that produces cinematic-quality animations with motion blur. Moreover, the Datasmith workflow preserves material hierarchies when you are importing a project from 3ds Max or Revit.Part 4. Key Benefits of Architectural 3D Animation DesignAfter exploring the top 5 3D animation software, here are the advantages of architectural 3D animation for your projects:Viewing Experience: 3D animations provide a realistic picture of architectural designs so clients can understand the project easily. As a result, this clarity reduces misunderstandings and brings them on the same page.Effective Marketing: These designs can be used in marketing materials to attract potential clients or investors. They showcase the design's features and benefits in a much clearer way than others.Cost and Time Savings: When you detect and resolve design issues early, it reduces the chances of expensive changes during construction. Animations help with accurate planning and budgeting, which benefits both clients and builders.Competitive Advantage: Since the firms that use 3D animation appear more professional and innovative, they stand out from the rest. With appealing presentations, they have a greater chance of winning more clients and projects.Virtual Walkthroughs: It is like watching the future, as clients can explore an architecture even before it is built. These virtual interactions allow them to zoom in and navigate a design to get a good look at it.ConclusionTo wrap things up, architectural animation can open a lot of ways for artists in terms of client acquisition. The guide discussed every step of the process to provide detailed knowledge of the process. During the process, rendering is the most resource-intensive part, which can put a lot of burden on the device. To save their computers and avoid delays, artists should utilize cloud rendering services like Fox Renderfarm.
더 보기
![How to Master Photorealistic Architectural Rendering [Key Insights]](http://static.rayvision.com/media/56_Realistic_architectural_rendering_definition_guide_and_tips_866c1aac41.png)
2025-04-23
How to Master Photorealistic Architectural Rendering [Key Insights]
Evolving technology has transformed the architecture industry, and architects think and present differently now. Photorealistic architectural rendering is necessary for industry professionals to design with both precision and lifelike realism. In the digital age, clients expect you to create designs that are above average. With the help of these detailed images that are appealing, clients can understand and connect with the proposed designs.Anyhow, this article will talk about the concept of photorealistic rendering and discuss its basic types. A detail on how the process unfolds will give you an inside view of how these renderings are created. Moreover, you will learn about some popular rendering software and an online rendering service that can optimize your workflow.Part 1. What is Photorealistic Architectural Rendering?It’s a process for generating images that look exactly like real photos of buildings. These images are not just basic sketches but detailed representations of how a structure will appear once built. Architects use 3D modeling software to construct the shape and then apply lighting for realistic architectural rendering. In this way, they can present their project in a visually appealing way that gives a vivid idea of the final output.While planning the architecture and design, this rendering helps in identifying flaws and giving clients a better idea of what to expect. The process involves careful attention to detail, such as how sunlight enters a room for a natural look. In simple words, it was created to make a design that is very close to reality and helps clients make decisions with more confidence.Part 2. Types of Photorealistic Architectural VisualizationNow that you have learned the basic concept, it is time to move to the types of photorealistic architecture renderings.Residential Exterior: This style creates detailed outside images of homes to give homeowners a clear view of the final look. It includes the full environment around the home and nearby buildings.Commercial Exterior: It involves rendering the outside of work-related buildings, such as offices or hotels. When it comes to commercial exteriors, the general goal is to make the building convey a message.Hospitality CGI: Architecture is perhaps the most vital in this industry as compared to any other. From technological integration to emotional appeal, a well-designed hotel must have a wow factor to stand apart from the rest.Residential Interior: This style is concerned with the details of living rooms and kitchens. It guides material selection to offer a clear idea of the overall design.Commercial Interior: In this type, you talk about the rendering of the exteriors of work buildings, such as offices and malls. It is focused on the design of the building and its relevance to the surrounding area.Part 3. Realistic Architectural Rendering Process in GlanceTo create a realistic architectural render, you will have to perform several key steps. Here is an overview of each step that adds detail and realism to the final image:1. Project UnderstandingThe very first step in creating a rendering is to have an in-depth look at the project. It is important to gather as much information as possible that can be beneficial. This understanding starts with reviewing the architectural drawings and material references. A necessary step for designers is to know the building's goal and client expectations. Gathering data and complete input at this stage saves time and prevents rework later.If you do not understand the basics of the project, the photorealistic architectural rendering may not match what the client has in mind. This step builds the foundation for everything that follows; even small details like window placements and floor heights should be noted at the start.2. Model CreationThis is the step where you use digital tools to create basic shapes and the layout of the building. For this purpose, software like SketchUp or 3ds Max is commonly used. The goal of this step is to build a realistic architectural render that includes major interior or exterior elements. At this stage, you will see the project mostly as a plain structure without any kind of colors and textures.The designers need to be highly accurate, as any mistake in scale or placement can make the final rendering look unrealistic. Plus, the level of detail will vary depending on the requirements of the project. An interior scene will have furniture, while an exterior scene will have trees in it.3. TexturingSince the model is now done, the phase of bringing your design to life begins. When you apply textures and materials to a model, it will increase the visual appeal and make it look real. For a realistic architectural rendering, this step adds colors along with shadows and reflections to your model. Media libraries usually have these textures, or some are made custom for the project.When the client needs a marble kitchen counter, the designer must find a texture that looks realistic at a close range. Moreover, multiple layers are used to control how the design looks under different lighting conditions. When this step is done, the model starts to look much closer to the final image. 4. Lighting SetupLighting in a rendering is just as important as it influences the mood and helps create depth. Designers can choose from natural or artificial lighting based on the environment to complement their model. They also adjust the intensity and color of the light to make sure the scene matches the vibe of the project. In technical terms, lighting involves adjusting the light sources and their interaction with materials.Additionally, a single scene may use multiple light sources to balance brightness and avoid dark areas. In photorealistic architectural rendering, sunlight settings can be customized according to the geographic location and time of day.5. Camera PlacementThe way a viewer experiences a 3D scene is established by the camera's location. Correspondingly, the angle of a photographic camera fundamentally influences the captured image. When creating a realistic architectural render, this virtual camera emphasizes specific design components. As a result, designers strategically locate cameras to acquire the most effective viewpoints, such as a wide-ranging view of a living room.Furthermore, multiple camera angles are created to show different parts of the project. A good rendering usually includes a mix of wide, medium, and close-up shots. In addition to the technical setting, this step tells the story of the design through visuals.6. RenderingThis is the step where all elements are processed to create the final image of the project. It’s like clicking the “export” button in a photo app, but the process is more complex in this scene. Rendering produces HD images from a 3D scene, which include textures for a realistic appearance. The duration of this step can be a few minutes or several hours, based on the quality settings.As photorealistic architectural rendering can slow down your computer, many professionals use cloud rendering services like Fox Renderfarm. With the help of powerful remote computers, these services make rendering faster and more efficient.7. Post-ProcessingAfter the render is completed, designers do some processes to fine-tune the image, much like editing a photo. To prepare the image for the client, small errors are cleaned up with the help of software like Photoshop. This step basically enhances the final look of your image and makes it look as good as it can be. Uneven lighting can be adjusted, and shadows can be softened in this step. This step is helpful in adding background elements like skies or people in the design. This post-processing is to make sure they get a photorealistic architectural render without changing the design itself.8. PresentationThe last step is preparing the rendered images to present in front of the client. Designers organize them into a PDF file or produce a detailed video walkthrough that clearly explains each part of the project or concept. When you are showing your designs to clients or investors, your way of presentation matters a lot. You should make sure it is attractive and allows people to understand the design easily.A good presentation includes labeled images and sometimes animations as well to make it visually appealing. Some designers also create comparison images showing the original plans and the final realistic architectural rendering side by side. This final step wraps up the process and ensures it is presented to the target audience in a clear way and allows them to make an informed decision.Pro Tip: Improve Rendering Efficiency Using Cloud Render FarmCreating a photorealistic architectural rendering can be troublesome, especially when you are working with detailed models. Local computers may struggle with the processing demands, and rendering will take longer. This is where cloud render farms come into play, which provide powerful computing resources for rendering. Fox Renderfarm is an excellent option for designers as it supports a wide range of 3D software, like Blender and Maya.Depending on the needs of your project, you can switch between GPU and CPU rendering. Moreover, it uses Raysync’s technology for faster uploading and downloading of files. Security of the users is a top priority, as this service is ISO27001 certified and a Trusted Partner Network (TPN) accredited vendor. The cloud rendering platform also has a dedicated support team that responds within 15 minutes and can be contacted through WhatsApp. Key FeaturesMax Storage: This platform uses high-performance SSD drives that handle your rendering files smoothly. In this way, you can access your data quickly and reduce delays during rendering.Integrations: It offers APIs that you can easily connect with your production pipeline. This allows you to automate tasks like uploading projects and retrieving rendered files.Pricing: You are able to select an option that suits your budget and the project. Moreover, it provides discounts for freelancers who have just entered the field of architectural design.OS Support: This cloud rendering service operates on multiple operating systems, including Windows, Mac and Linux. This flexibility allows the users to access the service from their preferred computer without issues.Nodes: When you need to process your render quickly, this platform sends thousands of rendering nodes. These powerful computers work together to process even large and complex scenes efficiently.Part 4. What Are the Popular Realistic Architectural Rendering Software and Renderers Today?After learning about the valuable cloud rendering service, let us learn about some popular realistic architectural renderings available today:1. KeyShotThis powerful software supports 34 different 3D formats to enable you to work efficiently with your models without compatibility problems. KeyShot is renowned for its advanced photon scattering algorithms, which ensure photorealistic architectural rendering. Its real-time ray tracing capabilities allow designers to visualize changes to refine designs. The software's extensive material library features scientifically accurate textures that enhance the realism of designs.2. Unreal EngineIt offers a comprehensive suite of tools for creating photorealistic architectural renderings with the help of its real-time rendering capabilities. Unreal Engine is equipped with new filtering tools and an overlay window for easier access to properties. It allows cinematic artists to control their sequences more efficiently and easily. Moreover, the Dynamic Sequencer feature allows users to bind objects at runtime and warp time within sequences.3. BlenderThe Cycles Render Engine of this software delivers photorealistic architectural rendering and supports both CPU and GPU rendering. The PBR shaders and HDR lighting features of Blender make it perfect for producing high-quality visuals with ease. Its powerful VFX tools allow users to track raw footage and see live camera movements within the 3D scene. With a set of comprehensive suites and UV tools, this software streamlines the rendering.4. V-RayUsing powerful ray-tracing technology, V-Ray empowers you to create realistic, high-quality animations. Its ability to simulate light and material properties allows you to create realistic architectural renderings. Moreover, it works with various design applications like Maya and Unreal. With its hybrid CPU and GPU rendering options, this software provides great performance results. Besides, region rendering and color correction preset tools allow you to tune your work precisely.5. EnscapeWhen designers make changes in their CAD or BIM software, this software instantly updates the design with its real-time rendering feature. Enscape comes with the NVIDIA ReLAX denoiser, which can eliminate the noise and increase the clarity. Moreover, its virtual Reality Integration takes your designs beyond the screen and allows you to create a photorealistic architectural render. It also offers an export feature for V-Ray and other applications like Cinema 4D.ConclusionTo sum up, photorealistic architectural rendering allows you to create images that look close to reality. This article discussed various types and detailed steps that helped you learn the process in detail. As the rendering process requires heavy resources, your computers may feel a lot of the burden. To optimize your workflow and make your systems feel light, you can utilize cloud rendering services such as Fox Renderfarm.
더 보기

2025-04-22
Rendering Engine for 3D projects: Definition, Software Top-List & Tips
When working with 3D projects, individuals require powerful tools that can process their animations, known as a rendering engine. This software transforms raw models into amazing images and animations that look close to reality. People use this software in multiple industries, including gaming and movies, for different purposes. As the landscape of technology is expanding, we are seeing more efficient and user-friendly rendering options.Thus, this comprehensive guide will explore what these engines are and how they work. You will learn about different types and the top rendering engines currently available in the market. Additionally, the article will introduce you to an advanced cloud rendering option that can be used in various industries.Part 1. What Is a Rendering Engine and How Does It Work?It's software designed to take complex 3D models and transform them into detailed 2D images and animations. The best render engine makes it easier to present and share 3D content in a more accessible format. This process involves calculating the interaction of materials and shadows within a scene to produce a stylized visual representation. As these engines determine the final appearance of digital content, they are important in various fields. Regarding working, it involves mathematical computations that simulate how light interacts with objects.Then, it generates each pixel of the final image by considering factors like light sources, surface textures, and camera angles. You can select between a Central Processing Unit and a Graphical Processing Unit to perform calculations. This selection is based on the engine design and impacts both the speed and quality of output.Part 2. Types of Rendering EnginesAfter learning about the basic workings of an engine render, it is time to discuss the available types of rendering engines.1. Real-Time Rendering EnginesThese engines produce images instantly to allow an interactive experience for the users. A real-time rendering engine is mostly used in industries such as video games and simulations. They increase the performance with the help of techniques like rasterization to approximate visual effects quickly. These engines render images and animations in the range of 20-120 frames per second and the normal of 30-60 FPS.To render in real-time, considerable processing power is used, and thus, it sacrifices some amount of quality as compared to its counterpart. The 3D models created with this engine may have less detailed textures, and other effects will be simple for optimized performance.2. Offline Rendering EnginesWith offline rendering, also called pre-rendering, you will see a more detailed graphic quality. This best rendering engine can accurately depict the physics of light and particle dynamics from fire, smoke, and wind. These types of engines are used for media that is entirely passive rather than interactive. Architectural designs and visual effects for film and TV are included in the areas where you can use these engines.While working on these engines, artists can create graphics of as high quality as they want. Moreover, they can use rendering techniques like ray tracing and global illumination while working on their designs.Part 3. The 5 Best 3D Rendering Engines in 2025Each type of rendering engine has its distinct features, and you can choose whatever fits your project’s requirements. Now, you will have a comprehensive overview of the best options that you should try in 2025.1. V-RayThis best rendering engine is a pioneer in the path-tracing tool that works easily with rendering software to create a work of art. V-Ray is famous for its CPU-accelerated processing, but now it supports graphics acceleration as well, which will allow artists to create highly realistic results. Besides, this tool has many features, such as realistic lighting and global illumination, to make lifelike designs possible.This tool has a playback player and comes with technical support to help artists with issues while creating. Users can enjoy the Gaussian Splats technology that allows the creation of 3D environments faster than ever.Pricing PlansV-Ray Solo: $84.90/monthV-Ray Premium: $119.90/month2. ArnoldA high-quality offline engine render developed by Autodesk makes it to the list of top rendering engines because of its great features. Arnold uses the Monte Carlo ray tracing technique to simulate the way lights interact with objects in a scene. With the help of the Catmull-Clark subdivision, artists can design smooth and curved surfaces. Its 3D motion blur feature interacts with shadows and reflections to make the project look natural.Moreover, it uses an advanced shading language called OSL to use in advanced projects for describing materials. It also offers robust denoising solutions to make your projects clearly audible without any distractions.Pricing PlansMonthly Premium: $55Annual Premium: $4153. CoronaThis best render engine is created specifically for use in the architectural industry. Artists can enable their Fast Caustics Solver to easily focus on intensified light patterns while reflecting. Moreover, Corona is compatible with a wide range of third-party plugins, so you can continue working with already used tools. To give you flexibility in working, it allows you to pause your work by using the Virtual Frame Buffer.In addition, if you enable the autosave feature, your progress will be saved after every few minutes. It has default settings that usually work best for most projects, and you do not have to change them every time.Pricing PlansCorona Solo: $59.90/monthCorona Premium: $72.90//month4. RedshiftDeveloped by Maxon, it is a GPU-accelerated rendering engine that is great for projects that need fast turnarounds, like animation and visual effects. Redshift is able to support complex scenes and large data sets without slowing down. It is now equipped with OpenPBR support that provides simplified parameters to offer consistent results. Moreover, the software allows Per-Point Attributes on hair curves to modify the color and length of hair.As it can easily integrate with other products of Maxon like Cinema 4D and ZBrush, it covers a wide range of projects that require multiple software. The engine has an extensive shader library that lets the artists visualize detailed materials like glass and skin.Pricing PlansMonthly Premium: $47.97Annual Premium: $274.295. OctaneThis rendering engine is popular for NFTs and motion graphics, and it supports cloud rendering. Octane includes valuable tools like volumetric rendering for managing smoke, fire, and smog. It also supports toon shading for cartoon-style visuals and even has options for virtual reality rendering in 360° formats. With the best render engine, what you see on the screen is the final result, and any changes you make are updated in real time.Furthermore, it works with many different 3D programs through over 21 plugins, and you don’t need to stick with just one tool. It also allows you to use special lighting effects like HDRI and mesh lights to give you control over how your scene looks.Pricing PlansMonthly Subscription: €23.95/monthPro Tips: The Best Render Farm for Most Popular Render EnginesSometimes, rendering complex scenes can cause delays or even freeze your computer. This usually happens when you are working on movies or large architectural projects, and rendering can take hours and even days. To cope with scenarios like this, users can use cloud render farms like Fox Renderfarm to save themselves from trouble. As it supports major rendering engines, such as Redshift, you do not need to switch the software.It uses Raysync's high-speed technology that will let you upload and download files super-fast and move large files smoothly. Additionally, this online render farm has flexible pricing, so you can choose a plan according to your projects. Studios that want to save time can integrate this service into their pipeline via APIs.Key FeaturesInstant Nodes: You get access to thousands of machines working together to render your projects faster. Besides that, it facilitates a dedicated customer care team that remains available 24/7 and responds quickly to queries, aiming to reduce unnecessary project delays.Multiple Platforms: There is no restriction on the type of system as it runs on various platforms, including Windows, Linux and Mac. Other than platforms, this service shows support for almost all popular 3D software and plugins, including Blender, Arnold, and V-Ray.Performance Storage: It has fast SSD drives that help you load your data quickly and save you from unnecessary lag. You can witness its efficient functionality through leading projects rendered through this service, such as Ne Zha 2.Data Safety: With international certifications like ISO27001 and TPN, your files and designs remain secure. Additionally, it provides an NDA non-disclosure agreement, which guarantees the rights and interests of customers’ projects.Rendering Options: Depending on the type of project, you can switch between CPU and GPU rendering based on your project needs. Besides, this service charges you according to your rendering needs and selected CPU or GPU options, saving significant costs.Part 4. How to Choose the Right Rendering EngineFor a smooth turnout of your project, you should make sure to choose the best render engine. Let’s take a look at the key things you should consider before settling for one:Project Type: Real-time engines like Unreal are great for games, while offline renderers like Arnold work better for films. You should make sure you choose an engine that fulfills your project’s requirements.Ease of Use: Some engines are easier for beginners to learn and produce quality results at the same time. Thus, you can go for Corona and Octane, which have simple interfaces that don’t overwhelm you with complex learning curves.Hardware: Your computer setup matters, as some engines may require GPU acceleration to perform better. Arnold may be more stable on weaker machines, while Redshift will perform better on advanced systems.Budget: Render engines come with different price tags, and they may charge you monthly or annually. Therefore, analyze your work and pick an engine that fits both your budget and project.Quality: When you need to render complex animations and produce high-quality results, you should go for engines like V-Ray or Arnold. They offer advanced materials and are used in professional studios.ConclusionTo sum things up, a rendering engine converts 3D designs into 2D images and has real-time and offline types. This article discussed some of the best engines that are available currently. If your system feels slow, Fox Renderfarm is a great option that has multiple rendering options and supports runs on various platforms. Thus, utilize this cloud rendering service that lets you process your projects without burdening your system.
더 보기