


Cinema 4D Web Submission
The web submission process for Cinema 4D primarily consists of four steps:
1. Upload;
2. Submit;
3. Analyze;
4. Rendering and download.
In the following sections, we will provide a detailed description of each of these steps. Includes video tutorials and text description tutorials.
Video for Cinema 4D submission
Step 1: Upload
1. Upon logging into the web interface, navigate to the Assets page, then download and install the transfer tool. Once the install is complete, click to launch the transfer tool.
2. Select the checkbox labeled "Maintain the local directory structure when uploading." If selected, the cloud will replicate the local directory structure, ensuring consistency between the cloud and local storage paths. If unchecked, you'll need to create folders in the cloud before uploading files;
Comparison of local and cloud asset catalogs:

3. Open the local folder containing your project files, select the project file you want to render, and click "Upload." (Note: Before uploading, please ensure you have modified and saved your rendering settings within Cinema 4D.)
4. Click "Submit" to enter the submission section.

Step 2: Submit
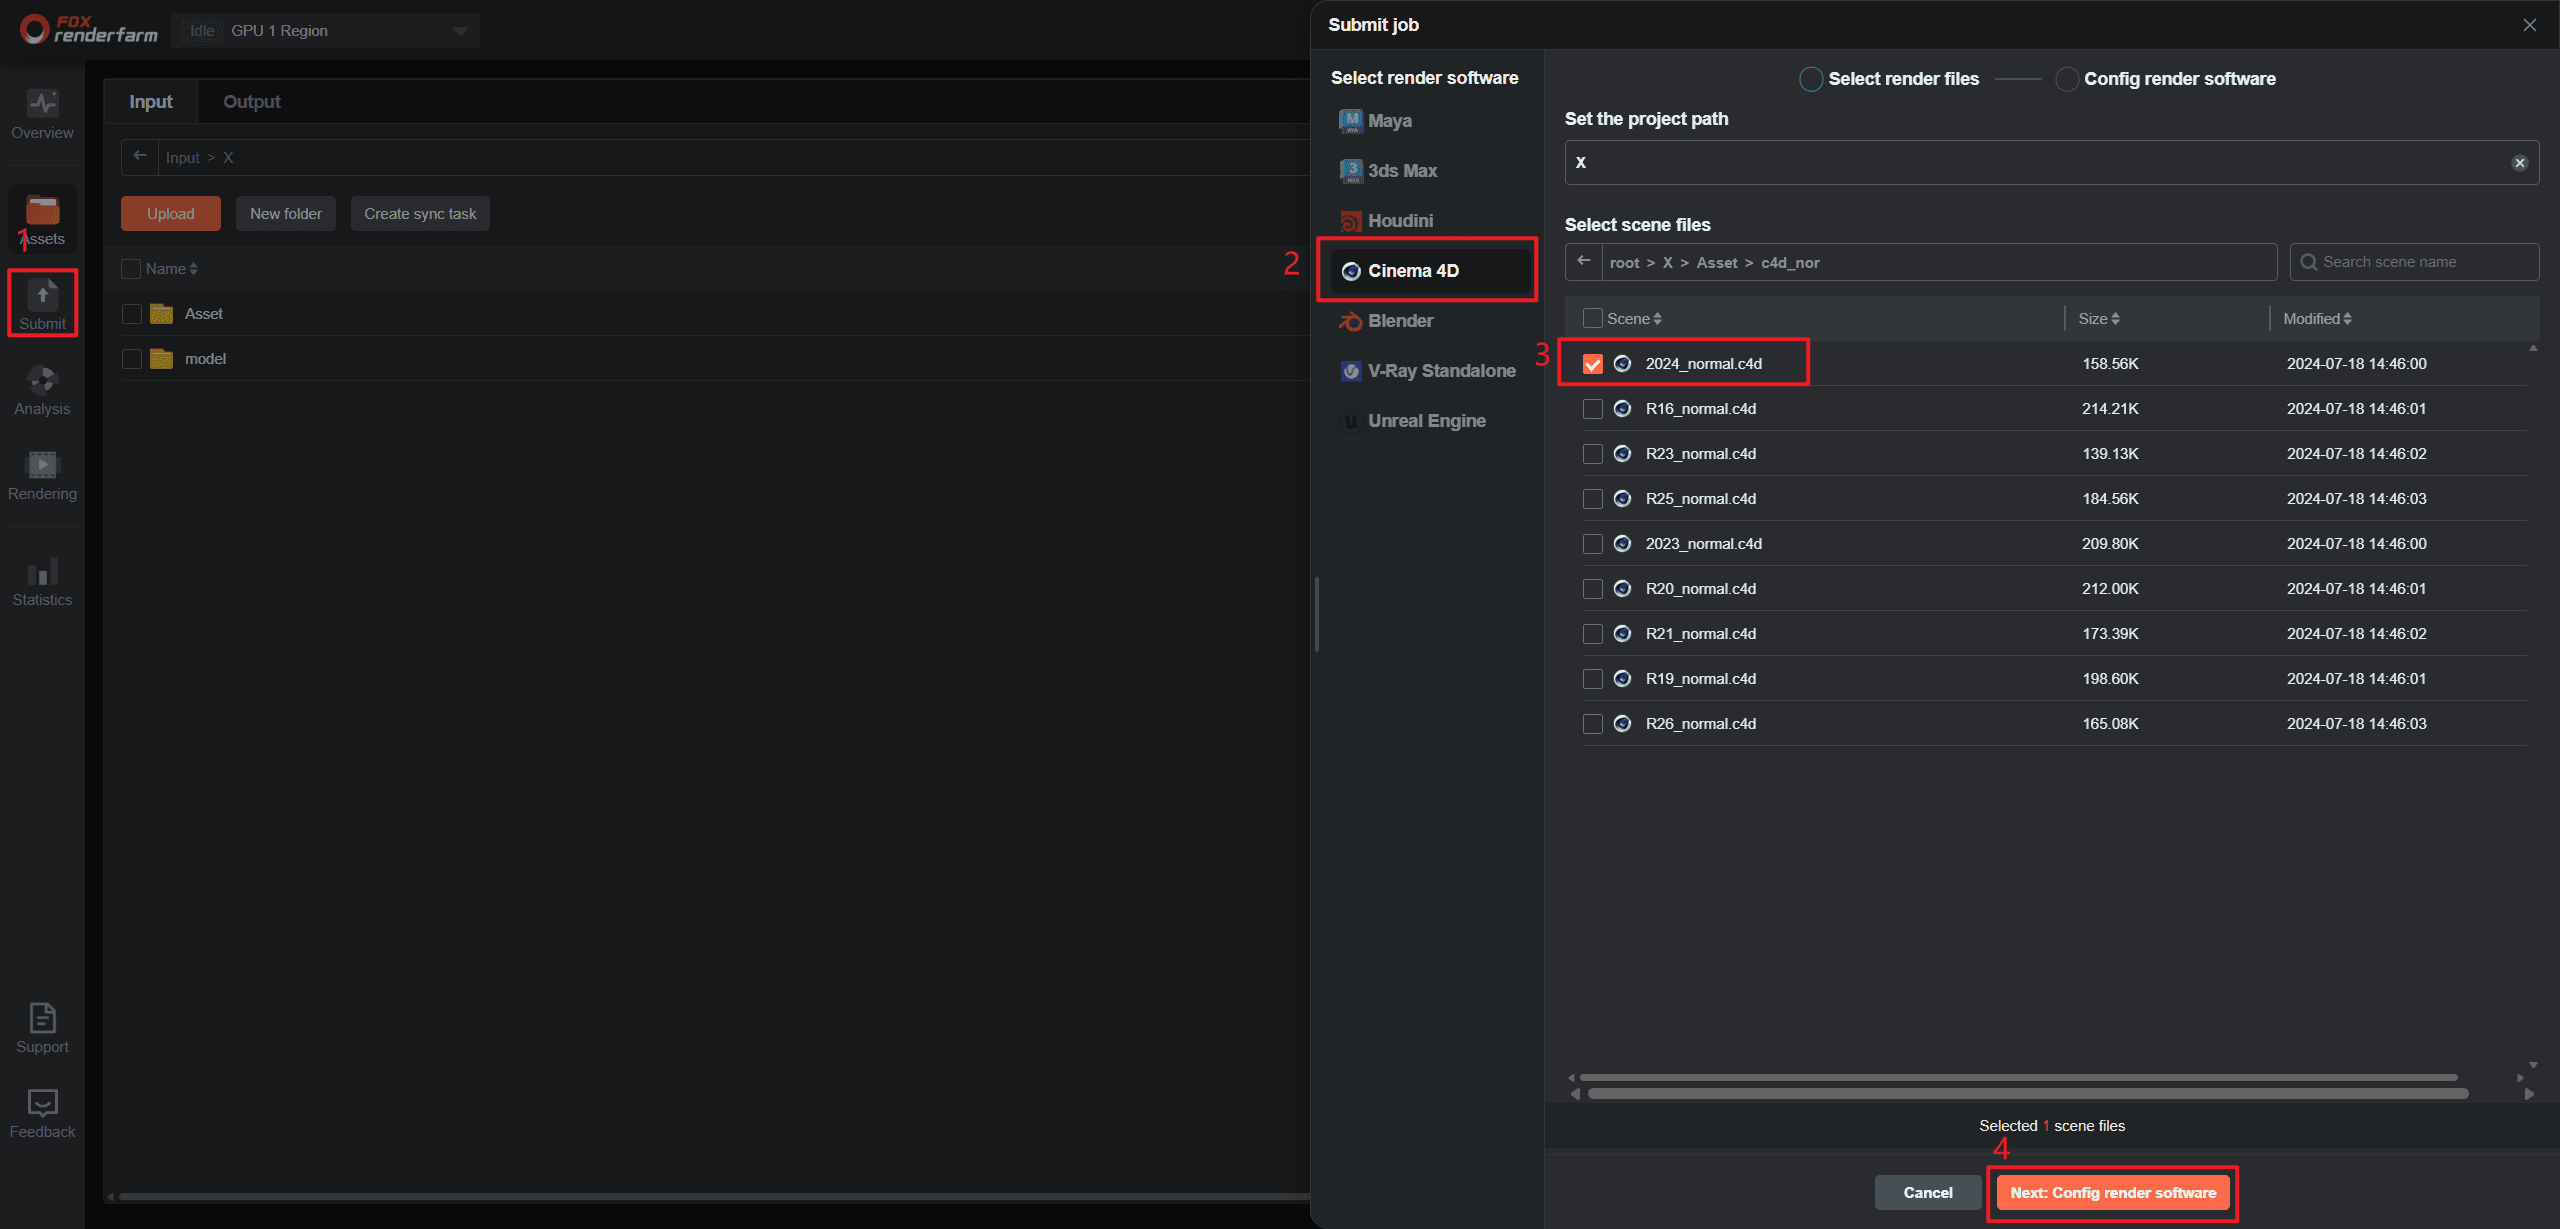
1.Proceed to the submission phase: first select the [Cinema 4D] software, then set the rendering project path and select the rendering scene file, and finally click [Next :Config render software ].
2. Proceed with software configuration. Click [Add Config] to add software and plugin configurations. In the configuration box, set up Config name, Rendering softwaare, Render system, and Plugin step by step.
If the required plugin information is not found, you can provide feedback to customer service for addition. After the settings are completed, click [Save].
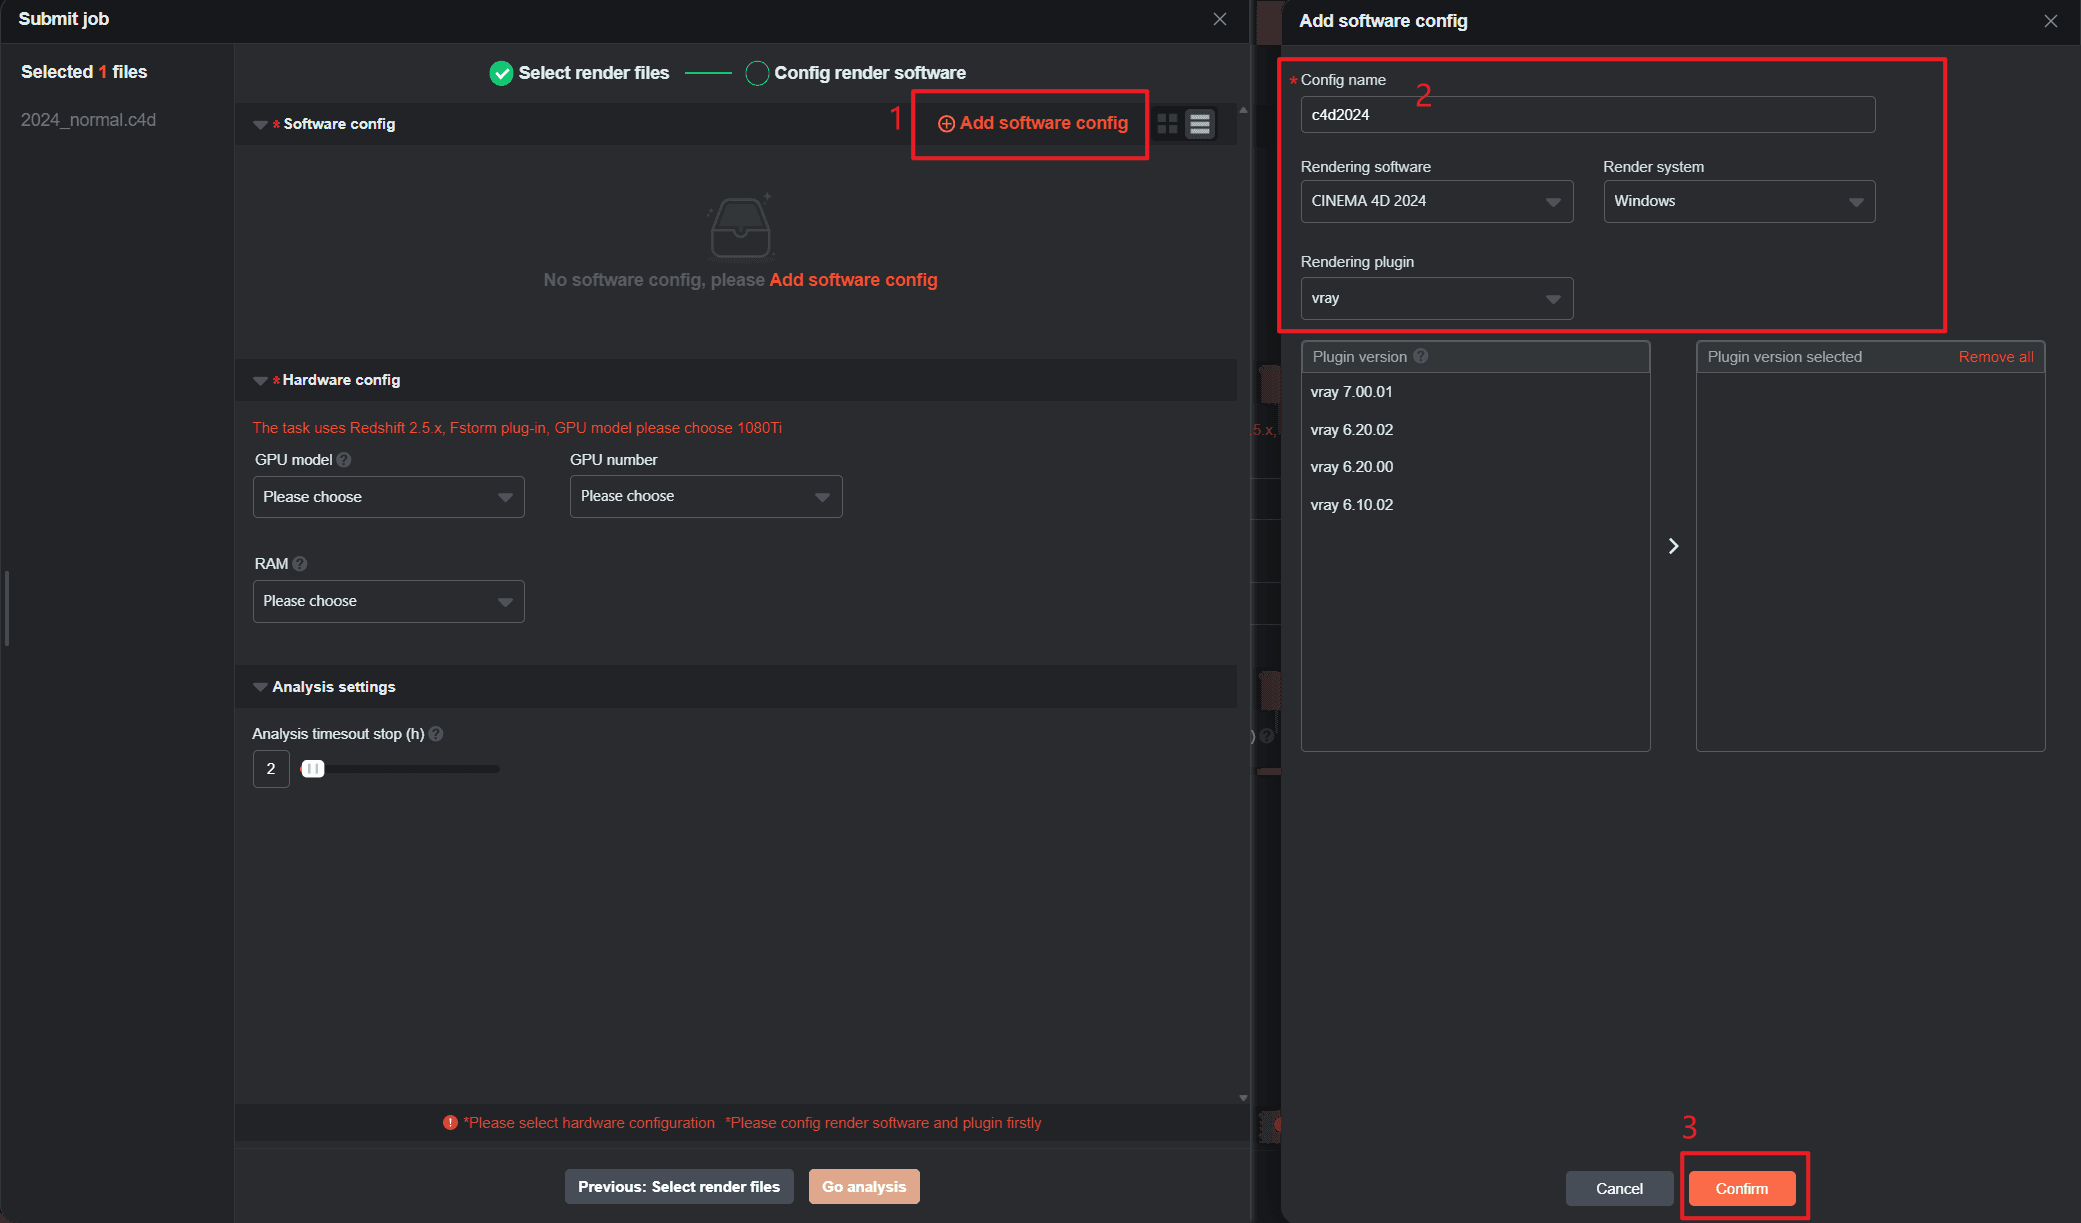
3.After configuration is completed, select the newly set software config and Hardware config, then click [Go analysis]. The job will enter the analysis phase.
Software config: Ensure that the selected software and plug-in configurations match your submit scenes.
Hardware config: Select an appropriate rendering machine per your requirements. The superior the configuration, the higher the rendering efficiency, enabling rapid completion of rendering tasks.
Analysis timeout stop (h): Defaults to 2 hours (customizable from 1 to 99 hours);After the analysis exceeds the set time, it will automatically stop.

Step 3: Analyze
1.After analysis, if there are no errors or warnings, click "Next " to submit the rendering. If there are warnings, you may ignore them and proceed with submission; if there are analysis errors, please modify as prompted before proceeding.

2. Set the rendering parameters. The specific parameters are as follows:
2.1 Render parameter setting
Select the cameras, frames range, output name, output type, gamma, width, height, output file format to be rendered.

2.2 Test frame setting
To ensure optimal results, we recommend that you prioritize test frames before clicking [Submit]. After the test frames are rendered, confirm that they meet your expectations. If so, click [Full Render] in the [Render List]. If you have any questions, please contact our online customer service.
In the initial state, three frames—the first frame, middle frame, and final frame—are automatically selected.

Custom test frames are allowed, with a maximum of 10 frames that can be entered.

2.3 Render setting
Project name: You can create a new project or select an existing project name. Adding a project will facilitate subsequent project management and billing statistics;
Frames per node: Number of frames rendered by one node(machine);
Timeout alert(h): An email alert will be sent if the rendering frame time exceeds the set limitation. The receiving email can be configured by yourself in Web->Message seetings->Job message settings;
Timeout stop(h): If the time - consuming of a rendering frame exceeds the set limitation, it will be automatically stopped and you will be informed via email. The receiving email can be configured by yourself in Web->Message seetings->Job message settings.

4. Click "Submit to Render" to initiate rendering.

Step 4: Rendering and download
1. During the rendering process, you can click on jobs to view rendering details;
2. After rendering is completed, click [download] to select files for download. Alternatively, you can click [Output File] to select files for download.


