Fox Renderfarm Blog
Top 5 Octane Render Farms For Your 3D Projects
Octane Render Farm
As the world's first and fastest bias-free, spectrally correct GPU render engine, Octane****Render has impressed many artists with its extraordinary render quality and speed. Using Octane in combination with the right render farm, working efficiency will be greatly increased. However, there are not many providers offering Octane cloud rendering services, and this post will introduce 5 high-quality Octane render farms for you to choose from.Fox Renderfarm: Best Octane Render FarmFox Renderfarm is a large render farm with over a decade of rendering experience. They support a wide range of software and plugins, with an online rendering platform and desktop clients for Windows and Linux. Uploading files on their platform is very fast as they have a corresponding plugin to support the transfer. In terms of price, the lowest price for GPU rendering is $1 per node per hour, and the higher the membership level, the lower the price. Their real-time online customer service is available for any questions and is very nice. For new users who have not experienced the Fox Renderfarm's cloud rendering service, a $25 free trial is there.iRender: High-Speed Octane Render FarmiRender is an IaaS render farm that allows users to remotely control cloud servers to render projects. On their cloud servers, you can install any 3D software, render engines and 3D plugins you want. As an Octane render farm, they have powerful render nodes: 2/4/6/8x RTX 3090/4090. Their pricing is based on node/hour and prices vary depending on the servers offered. They also have real-time online customer service.Rebusfarm: Render Farm for OctaneRebusfarm is also a large render farm and they have rendered a lot of architectural works. It is based on a SaaS model, and with the help of their plugins, you can send projects directly from 3D software. They don't have real-time online customer service, which requires you to fill out a form with your question and wait for a reply. Rendering with their GPUs costs 3.79 cent/OBh and that price is independent of the number of machines used, they only charge for engine time.Ranch Computing: Render farm for Octane RendererRanch Computing is also a render farm based on the SaaS model, and their proven rendering experience allows them to provide very high quality rendering services to artists. They also have their own plugin to help users send rendering projects directly from the application. Their prices vary from Low-Medium-High levels, and you can choose according to your needs. Currently there is no customer service button visible on their page, but if you have problems, you can tell them through the form on the contact page and wait for a reply.Drop Render: Octane Renderfarm for Cinema 4DDrop Render is different from the render farms above, as it's a render farm designed for Cinema 4D rendering, but now supports Blender as well. Their plugin allows users to not leave the 3D application and will send the project directly to their servers and automatically store the rendered frames on your hard drive. Regarding pricing, you can choose a level based on the urgency of your project and your budget; the higher the level, the faster your project will receive rendering. They don't have an online customer service, though the support page can answer most of your questions or wait for their technical team to contact you.Each render farm has its own features and differences in service. Artists can choose your favorite one according to your preferences.
Octane For C4D Tutorial: How To Make A Strange Cube
Octane for C4D
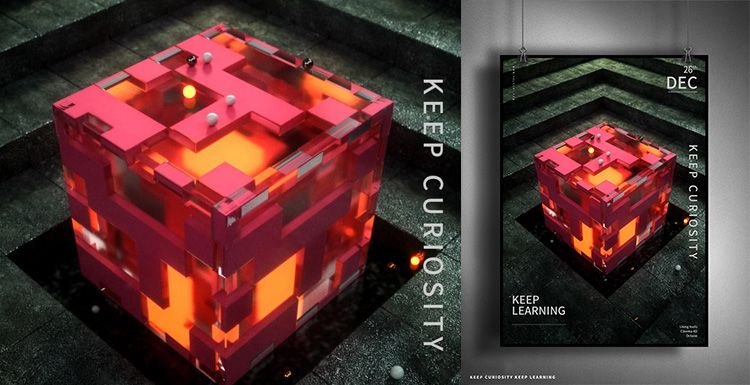
As the leading cloud rendering services provider and GPU &x26; CPU render farm, Fox Renderfarm is here to share with you a Octane for C4D tutotial.It is not difficult to make the above-mentioned block effect. It is mainly the application of the mixed material of Octane renderer. Let us look at how this strange cube is made. The main software that we use including Cinema 4D, Octane renderer and so on.Firstly, we should create a rounded cube, and a new clone of the cube.In this file, 15 copies are cloned in each axis, because the cube is 100 * 50 * 100 px, so the size is 1400 * 700 * 1400 px.On the premise of selecting the cloned object, create a new motion graphics-effects-simple effector, turn on the attenuation, the attenuation type is square, the attenuation is adjusted to 100%, then adjust the attenuation size, and then adjust the position of the Y-axis parameters. The feeling of layer by layer is coming out.The material of the ground material under the middle cube of the reference picture is different from the material of the scene. Here, a new plane is placed on top, and a new cube is placed again, placed in the middle, and the rounded corners are also given to a parameter.The model part has almost been created, and now you can start making the lighting part. Create a new HDR light for lighting.Firstly, create a new reflective material, modify its color, roughness and reflection intensity to adjust to the appropriate effect. Create a new transparent material, here modified the refractive index, the real effect may be seen when rendering, can be fine-tuned after rendering.Create a new hybrid material again, mix the transparent material and the reflective material, and add a noise map to select the type of noise as a unit, so that the texture will be displayed in the form of a square, then control the global zoom, brightness, contrast Wait to control the range of the display.Directly copy the noise map directly to the replacement channel, and the parameters of the replacement can also be adjusted.I feel that there should be another layer outside the cube, so I copied a cube and slightly enlarged it to give a transparent material. Temporarily hide the two cubes just now, and then create a smaller cube to create a glowing material.The scene material is a reflection material, where 3 stone texture maps are attached, and the texture can be modified to change the gamma value or intensity depending on the situation. Then the UV map is projected in a cube. The plane below the cube is also a reflective material, then a noise is added to properly adjust the roughness and the intensity of the reflection.Now set the output size, place the camera, then fill the light, change the color temperature, and if the cube reflects the light.The cube also needs to add some decorative spheres, create a new emitter and sphere, make the sphere a subset of the emitter, adjust the emitter parameters appropriately, and check the display object. Add the analog tag rigid body to the emitter, apply the inheritance tag to the subset, and select the individual elements. Add the analog tag collision body to the cloned object and the outermost glass cube. Click the play button and the ball will naturally fall on it.Now add a little depth of field, the effect is almost the same. That's all.Fox Renderfarm hopes it will be of some help to you. It is well known that Fox Renderfarm is an excellent cloud rendering services provider in the CG world, so if you need to find a render farm, why not try Fox Renderfarm, which is offering a free $25 trial for new users? Thanks for reading!Reference Source: Https://www.bilibili.com/read/cv2176795?from=search
Octane For C4D Tutorial - Making Forest Scene Model Light Rendering (2)
Octane for C4D
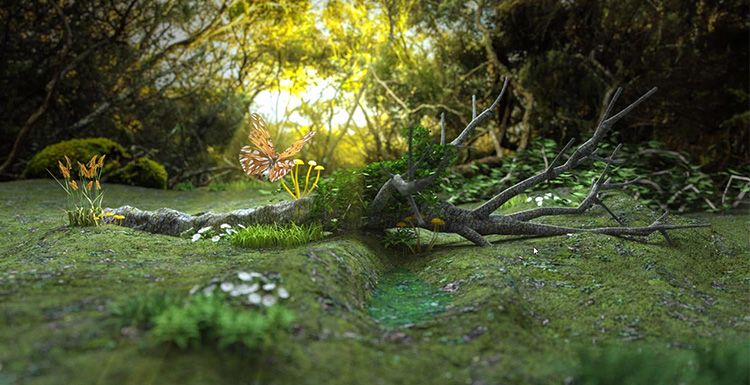
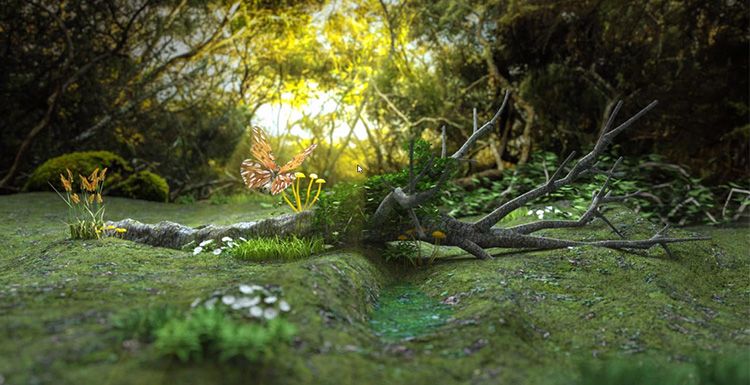
As the leading cloud rendering service provider, Fox Renderfarm, is going to share with you the second part of the tutorial of Octane for C4D, making forest scene model light rendering as an example.Octane For C4D Tutorial - Making Forest Scene Model Light Rendering (1)In the previous tutorial, in order to make the scene more natural, many kinds of plants were added to the scene. After preparing to use the Octane renderer, all textures need to be converted to Octane's texture.You can select all shaders that are not Octane, and convert all shaders to Octane shaders in Convert Matenials under Materials.After converting the shader, remember to clean up the shaders before.What you need to deal with now is the texture of the ground and the texture of the dead tree. The texture of the ground is Octane GLossy Material, which adds a total of Diffuse, Specular, Bump, Normal, Displacement.Add a picture to the background and adjust it to the appropriate size and position.Add the mushroom material, create a new Octane Specular Material shader, modify the Medium and Fake Shadows, change the mushroom to yellow and modify the butterfly material.Now adjust the lights. Octane's Octane Arealight is used here, and the position of the light source simulates the sun's lighting effect according to the position in the background image. First illuminate the background with a light, then use another light to illuminate the tree.Remember to turn off the light display and the lights will not be rendered in the rendered view. Be sure to adjust the intensity of the light with reference to the background image. Now adjust the light while rendering. This is a step that needs to be tested continuously.The outlook is a bit dark, copying the care of the Octane Arealight supplement.In the process, I feel that the position of the mushroom has exposed. Now put the mushroom in a lower position to avoid exposure.Modify the camera settings, Kernels changed to Pathtracing option, Max samples changed to 1000, Diffuse depth changed to 8, the rendering speed will be slower. Change the GI clamp to 3 to reduce the noise of the exposure.When Cameralmager's Response is changed to Linear, the rendering effect will be closer to reality.Now focus on the butterfly and add some depth of field.Now that the effect is nearing completion, you only need to add some light fog in the later stage.ConclusionThe above is all of the tutorial of Octane For C4D for this time. Fox Renderfarm hope it will be of some help to you.As you know, Fox Renderfarm is an excellent cloud render farm and leading cloud rendering services provider in the CG world, so if you need to find a render farm, why not try Fox Renderfarm, which is offering a free $25 trial for new users? Thanks for reading!
Fox Renderfarm Launches GPU Rendering
Blender Cycles
Rendering and previewing in a flash! The craze for Marvel’s superhero movie Deadpool swept over the world.As the first full CGI realistic human feature film in Asia, Legend of Ravaging Dynasties dominated the headlines once the trailer came out.These two movies were rendered with GPU rendering engines.Obviously, GPU computing card and GPU rendering engines are gradually used in film production. It is a good start!Now, as the leading render farm in the industry, Fox Renderfarm launches GPU rendering. Let’s start free trial with Fox Renderfarm’s GPU rendering. Let’s get it started!What’s the differences between GPU and CPU?A simple way to understand the difference between a CPU and GPU is to compare how they process tasks. A CPU consists of a few cores optimized for sequential serial processing, while a GPU has a massively parallel architecture consisting of thousands of smaller, more efficient cores designed for handling multiple tasks simultaneously. Adam Savage and Jamie Hyneman made a painting demonstration to show the difference between CPU and GPU:Mythbusters Demo GPU versus CPUWhat’s the advantage of GPU Rendering ?In the field of graphics rendering, not only films and animations, but also CG art, GPU with its computing ability and architecture specially designed for graphics acceleration provides the users with a more efficient rendering solution, namely the GPU rendering solution. GPU rendering has great advantage of fast speed and low cost. Moreover, GPU rendering becomes more and more available now, lots of works with high quality rendered with GPU has come out. GPU rendering tends to be popular with users at home and abroad.Thinking of the CPU as the manager of a factory, thoughtfully making tough decisions. GPU, on the other hand, is more like an entire group of workers at the factory. While they can’t do the same type of computing, they can handle many, many more tasks at once without becoming overwhelmed. Many rendering tasks are the kind of repetitive, brute-force functions GPUs are good at. Plus, you can stack several GPUs into one computer. This all means GPU systems can often render much, much faster!There is also a huge advantage that comes along in CG production. GPU rendering is so fast it can often provide real-time feedback while working. No more going to get a cup of coffee while your preview render chugs away. You can see material and lighting changes happen before your eyes.GPU Renderer 1.Redshift is the world’s first fully GPU-accelerated, biased renderer and it is also the most popular GPU renderer. Redshift uses approximation and interpolation techniques to achieve noise-free results with relatively few samples, making it much faster than unbiased rendering. From rendering effects, Redshift can reach the highest level of GPU rendering, and render high quality movie-level images.2.Blender Cycles is Blender’s ray-trace based and unbiased rendering engine that offers stunning ultra-realistic rendering. Cycles can be used as part of Blender and as stand-alone, making it a perfect solution for massive rendering on clusters or at cloud providers.3.NVIDIA Iray is a highly interactive and intuitive, physically based rendering solution. NVIDIA Iray rendering simulates real world lighting and practical material definitions so that anyone can interactively design and create the most complex of scenes. Iray provides multiple rendering modes addressing a spectrum of use cases requiring realtime and interactive feedback to physically based, photorealistic visualizations.4.Octane****Render is the world’s first and fastest GPU-accelerated, unbiased, physically correct renderer. It means that Octane uses the graphics card in your computer to render photo-realistic images super fast. With Octane’s parallel compute capabilities, you can create stunning works in a fraction of the time.5.V-Ray RT (Real-Time) is Chaos Group's interactive rendering engine that can utilize both CPU and GPU hardware acceleration to see updates to rendered images in real time as objects, lights, and materials are edited within the scene.6.Indigo Renderer is an unbiased, physically based and photorealistic renderer which simulates the physics of light to achieve near-perfect image realism. With an advanced physical camera model, a super-realistic materials system and the ability to simulate complex lighting situations through Metropolis Light Transport, Indigo Renderer is capable of producing the highest levels of realism demanded by architectural and product visualization.7.LuxRender is a physically based and unbiased rendering engine. Based on state of the art algorithms, LuxRender simulates the flow of light according to physical equations, thus producing realistic images of photographic quality.GPU Computing Card Parameter Table Now Fox Renderfarm is applicable to Redshift for Maya and Blender Cycles. There are more than 100 pieces of NVIDIA Tesla M40 cards in Fox Renderfarm cluster, each server has 128G system memory with two M40 computing cards. Welcome to Fox Renderfarm to experience the super fast GPU cloud rendering!
Octane For C4D Tutorial - Making Forest Scene Model Light Rendering (1)
Octane Render
As the leading cloud rendering service provider, Fox Renderfarm, is going to share with you a tutorial of Octane for C4D, making forest scene model light rendering as an example.This is a simple natural forest scene production, the main elements are composed of branches, butterflies, grass, mushrooms, vines and several kinds of grasses, divided into three parts including foreground, medium and background. The main production software and plugins for this small scene model lighting rendering tutorial include C4D, Forester, Levy Grower, Octane renderer.Making TerrainCreate a new terrain, turn the function off to sea level that can get the terrain. Modify the terrain to achieve a satisfactory effect, and create a surface behind the scene for background texture.Making BranchesForester's plant library is very rich, and you can choose a satisfactory tree to generate. The tree used in this scene should be a relatively dry tree, so make some adjustments on the basis of the original. Remove excess branches and twist the trunk.Adjust the Position of the Placed Tree.Firstly, we should determine the camera position, then place the model of other objects according to the camera position. It is recommended to use the Octane renderer’s camera. Now adjust the lens position in the view, in this process you need to mainly reserve the foreground and the background position.Now the interaction between the ground and the trunk is not enough, so you can use the brush to adjust some of the unevenness of the ground, so that the combination of the branches and the ground is more natural.Add a mushroom to this step. You can make a cluster first, then copy the mushrooms and then scale and place them.The butterfly directly uses an existing model to find the location directly in the camera. Now that the models that need to be prepared in the early stage are available, the rest of the elements can be created with plugins.In order to look more natural, there should be some vines placed in the distant background map, and Lvy Grower is very simple to make vines. Some vines are also added to the trunk.Don't forget to adjust the position of the plants in the lens. Remember that both the foreground and the mid-range need to be placed. Use Forester to continue adding other types of plants and adjust them while continuing to place.In the real-time selection, change the ground mode to the vertex drawing mode, and then you can draw the area that needs to grow the grass, which can be random. You can now select the Objects/Octane Scatter in the Octane renderer and add the grass to the Octane Scatter and place the terrain on the Surface of the Octane Scatter. Change the Distribution mode to Surface mode, and then map the previously drawn vertices to the Vertex Map under Octane Scatter. Now only the area that was previously drawn will grow out.Use the Octane renderer to see the effect.We need to add a random effect for the grass. Add effects to the Effectsor under the Octane Scatter and turn off the position changes in the random effects. Just select the zoom size and rotate randomly.Now the effect of the grass is ok, but some flowers are still missing. Continue to use Forester to plant some flowers for the grass.In order to enrich the level, you need to add a few shorter shrubs. The more plant species, the richer the picture looks.Now that the plant is almost finished, how to make it later, please follow the best cloud rendering services provider adn CPU &x26; GPU render farm to our next article — Octane For C4D Tutorial - Making Forest Scene Model Light Rendering (2).
An Artwork Production Sharing By Octane For C4D
Octane Render
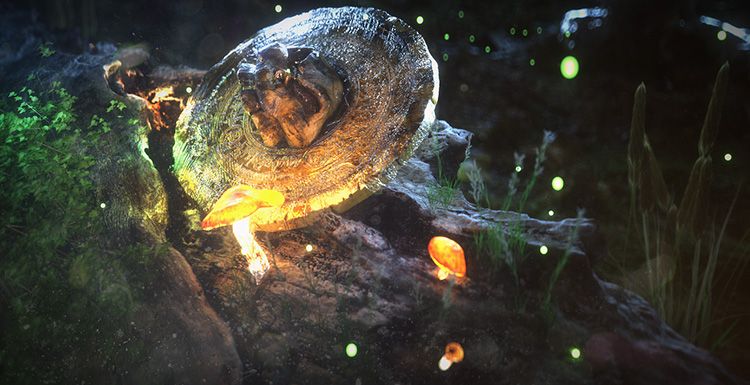
The software used are C4D, Megascans, Zbrush, Substance painter, Octane renderer Collecting material The early data collection is also necessary. I usually look for good ideas on Painterest and then find out what these things look like on Google. This method is not limited to this one. Making a model In the ZBrush engraving model, I am not very good at ZBrush, but fortunately my model does not require too much delicate engraving, as long as it produces a large shape. UV I import the model into Unfold3D and expand the UV. The UV parts are kept as continuous and do not overlap, but multi-stretching is good. Material and details I use Substance painter to make the material and use the material to make up for the details without engraving. (I don't have a ZBrush topology. In order to keep the model number is not too big, I also saved a lot of small details. So I used bump in the Substance painter to make small details. C4D environment construction I picked the right trees and stones and fungal models in megascans, then put them into C4D and built the environment and lighting. (At first I thought that only three lights could be used, but during the production process I added more lights to outline the gold coins. Rendering I used the octane renderer for rendering, which has accurate spectral calculations. There are many ways to achieve the desired effect in post-production, and you can choose what you are good at. The color of the original image is too saturated, I lowered the saturation and added a little dirty stain, and then adjusted to increase the blurring of the vignetting and the edge, making the lens feel stronger. This production process is shared here, and some processes may not be the best. But there are many ways to make a picture. The software is just a tool. How to use it is depending on the person who uses it. I hope everyone can like it. My other works, By: Xclucis
Top 5 Best and Free 3d Rendering Software 2025
3D Rendering
The need for exceptional free 3D rendering keeps increasing, so it's critical to have access to strong and dependable software that can realize your imaginative ideas. In this article, as the leading cloud rendering service provider and render farm in the industry, Fox Renderfarm will recommend top 5 3D rendering software choices for 2025. These software options are commonly seen as the best rendering software and are worthwhile to take into consideration whether you're a professional artist, architect, or just a hobbyist interested in learning more about 3D rendering.Blender - Free 3D Rendering Software© BlenderBlender is one of the most effective and adaptable free 3D rendering software out there, which has been around for a while. It has many features and capabilities in addition to being open-source and free. Blender has sophisticated rendering methods that enable incredibly lifelike images, such as global lighting and ray tracing. Blender's user-friendly interface and robust community support make it a great option for users of all skill levels, especially new solo artists without a budget.Octane Render - GPU 3D Rendering Software© OTOYA rendering engine that runs on a GPU, Octane Render excels in producing images that are both quick and crisp. Octane Render offers a free rendering version that is adequate for most users in addition to a paid version with more capabilities. Professionals in the field love it for its physically accurate lighting and real-time rendering capabilities. Since Octane Render easily interfaces with widely used 3D modeling tools, many designers and artists find it to be a useful option.Arnold - Popular 3D Rendering Software © AutodeskArnold is a popular rendering software that is renowned for producing realistic images and outstanding performance. It provides both CPU and GPU rendering options, giving users flexibility in choosing the most suitable hardware for their rendering needs. Arnold's sophisticated lighting and shading features make it simple for users to produce breathtaking 3D images. Professionals find it to be a popular option due to its compatibility with well-known software programs like Maya, 3ds Max, Houdini, Cinema 4D, etc.V-Ray - One of the Best 3D Rendering Software© ChaosV-Ray is still in high regard as one of the best rendering software choices out there today. It is known for its high-quality photorealistic rendering capabilities and is used in various industries such as architecture, design, visual effects, and animation. V-Ray works as a plugin for popular 3D modeling and animation software such as Autodesk 3ds Max, SketchUp, Rhino, Maya, and Cinema 4D. With the many lighting and material options that V-Ray provides, users may produce incredibly realistic and eye-catching effects. For numerous pros, it is the preferred option.Lumion - Real-time 3D Rendering Software© LumionRealistic and immersive visualizations are the main focus of Lumion, a potent and intuitive 3D rendering software. Lumion's ease of use and real-time rendering features make it accessible to a wider audience, even if its primary market is architectural visualization. Without requiring in-depth technical knowledge, Lumion's large collection of pre-built 3D models and materials enables users to easily create amazing visualizations. It is a popular choice among architects, designers, and visualization professionals to bring their designs to life and communicate their vision effectively.ConclusionTo sum up, the previously mentioned list of the top 5 3D rendering software options for 2025 provides a variety of features and capacities to meet different needs. Blender, Octane Render, Arnold, V-Ray, and Lumion are all fantastic options that can assist you in realizing your artistic ambitions, regardless of whether you're a professional or a hobbyist artist. Besides, if you want to improve the rendering speed of these software, you can choose a reliable cloud rendering service, such as Fox Renderfarm, which offers a $25 free trial to every new user.
Recommended reading
Top 9 Best And Free Blender Render Farms of 2025
2024-12-30
Revealing the Techniques Behind the Production of Jibaro "Love, Death & Robots", Which Took Two Years to Draw the Storyboard
2025-02-10
Top 10 Free And Best Cloud Rendering Services in 2025
2025-03-03
Top 8 After Effects Render Farm Recommended of 2025
2025-02-10
Top 5 Best and Free 3d Rendering Software 2025
2025-02-10
Shocked! The Secret Behind Using 3D to Make 2D Animation was Revealed!
2025-02-10
How to Render High-quality Images in Blender
2024-12-04
Easy Cel Shading Tutorial for Cartoon in Blender Within 2 Minutes
2025-02-10
Partners


