Lighting is tough and it can be quite challenging, but it is always rewarding in the end. It can either break your renders or take your renders to the next level.
This article will help you achieve good lighting for your characters, and not only that, it will work for every character.
This tutorial is for Blender but you can apply the same concept in any software.
Concept:
We are going to use reverse key lighting technique, in which the subject is lit from the opposite side of the camera or the dark side of the subject.

This technique is mostly used in cinema and films where the subject is shot from its dark side.
Not only that, we will create two different lighting setups, one for the dark and one which is natural.
We will also learn the concept of light blocking and light linking.
Backlight:
First we have to create some highlights which will create some depth between our character or subject and the background.
You can do that with an area light in Blender.
- Add an area light.
- Make sure to enable the copy global transforms in the preferences.
- Select the area light and select the camera with shift, press control + C, and select copy location, do the same for the rotation.
- Change this to the 3d cursor, rotate the light at 180 degrees. You have to place the light behind the character just like this.
- Play with the intensity until you get some highlights like this. This will separate our main subject from the background.

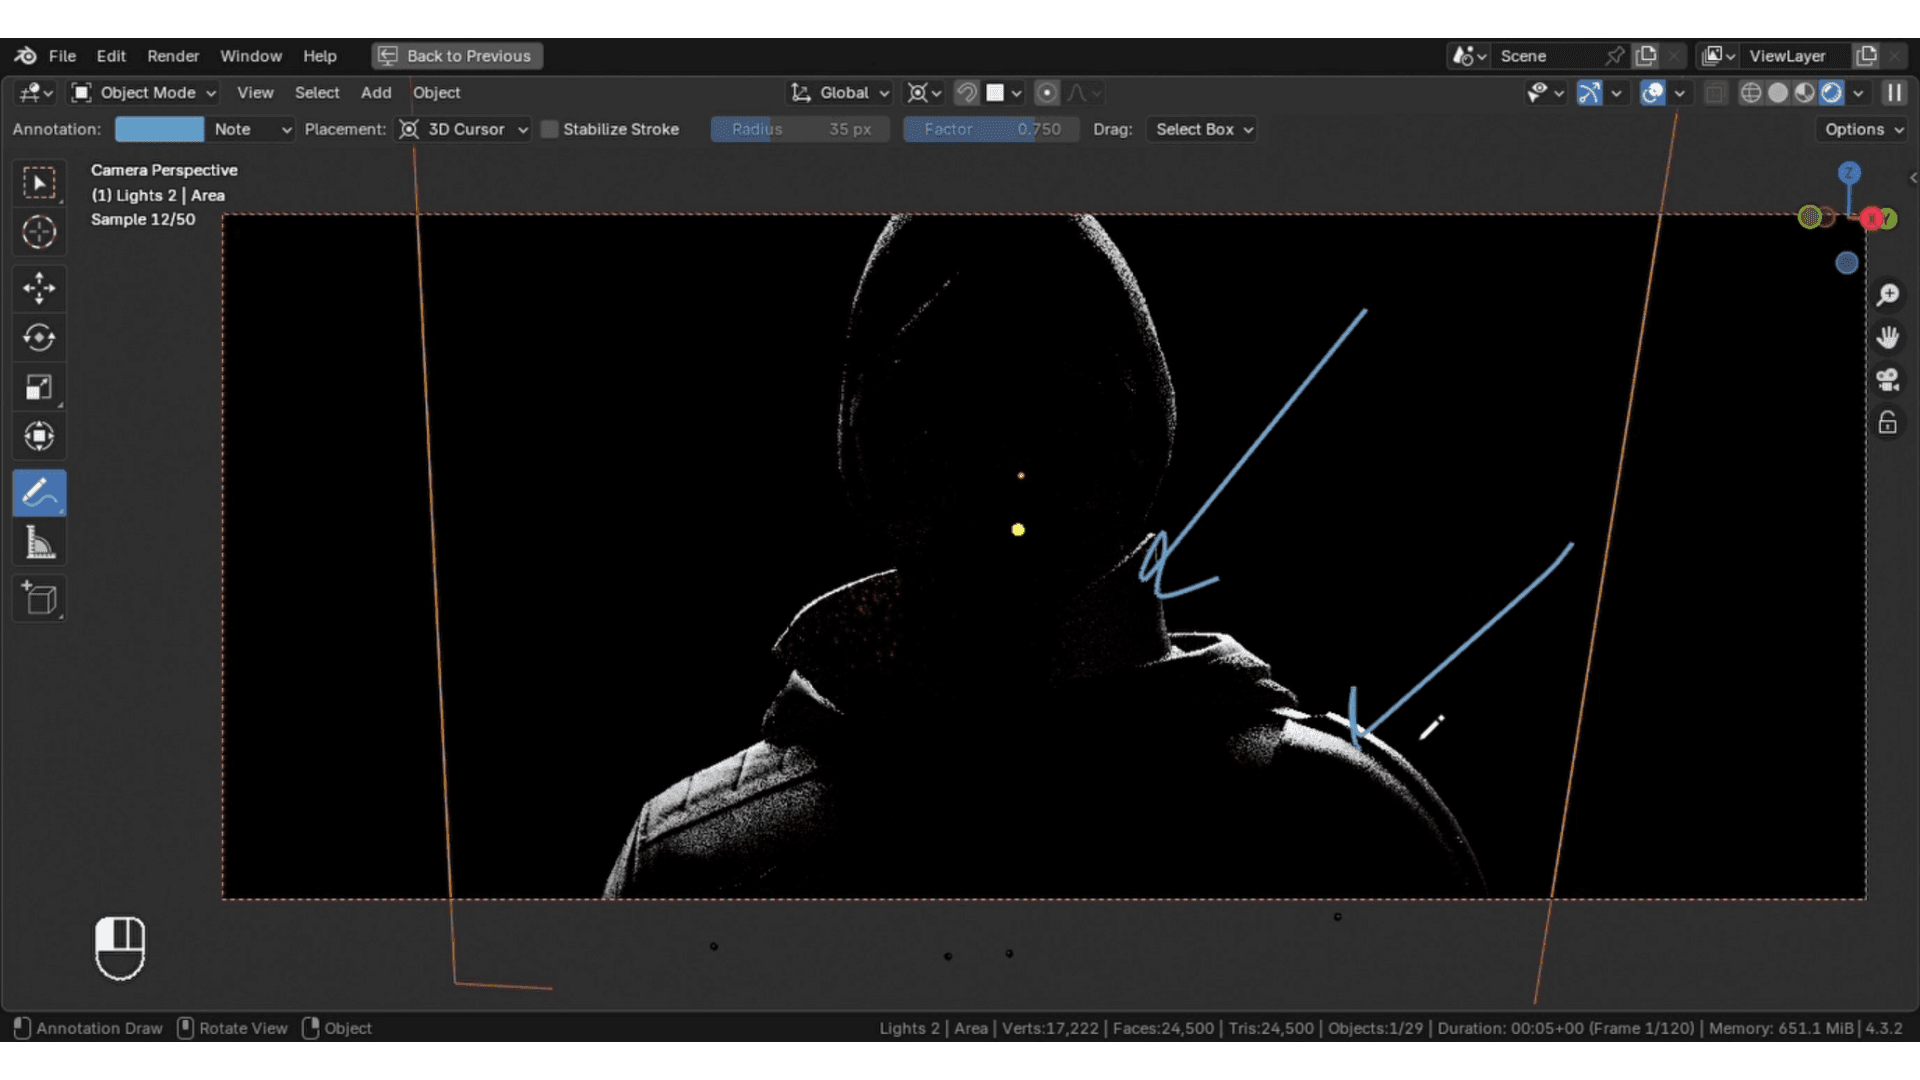
Key Light:
We need one more light which will create sharp shadows, this will add some mystery to the character.
- Add another area light.
- Move it to the top of the character.

- Rotate it a bit so that it goes behind the character.
- Decrease the spread and play with the intensity until you get something good like this.

Add Emotion/Life:
This part is optional but it can sometimes add some emotion into your character.
In films, characters have a small light reflection in their eyes which shows some kind of emotion.
This makes a huge difference, and you can do this in Blender with light linking.

- Add an area light.
- Move it closer to the eye until you see some reflections.
- Once you are happy with the reflections, go into the object tab and go under the shading tab. Make sure the light is selected and create a new light link, drag the eyes and drop it into the light link tab. This light, now, will only affect the eyes.
- To get those circular reflections, you can use something like a softbox texture, you can get one for free from here. Softbox
- Reduce the spread value and open the shader editor. Check “use nodes” and add an image texture, open the softbox.exr and you are good to go.
You can see the huge impact it makes and the softbox makes it more epic.
Now, if you add some volumetrics and lens effects, your character lighting will be complete, and it will look great, but if it's too dark, don't worry, this article will cover everything.
Fill Light:
If you are not a fan of cinematic lighting, you can use an HDRI as a fill light to fill some dark spots.

- The best place is polyhaven.com.
- Get a 4k HDRI in EXR format, EXR gives more control over multiple things like exposure and more.
- In the shader editor, switch to the world tab and add an environment texture.
- Add the HDRI you got and play with the intensity.
- The best way to push the HDRI is by using a math node, changing it to power, and setting the power to point one.

Light blocking:
The HDRI will more likely ruin the character lighting because it lights from every side, and it looks bad and breaks the reverse key lighting concept.
You can fix this with light blocking, which is a standard way to reduce light where you don't need it.
You can do this in blender very easily.
- Add a plane.
- Create a new material and increase the roughness and change the color to black. This is necessary because white reflects light, and we don't want that.
- In the object tab, uncheck the camera under the visibility tab in object properties, and switch the viewport display to bounds.
- Rotate the plane and set it to the front of the subject, scale it so that it blocks the light.

You have to experiment with it to achieve the best results.
I hope this article will help you to achieve best character lighting in Blender, and when you are done with the lighting, try the cloud rendering service Fox Renderfarm to render your character in high quality faster than ever.
You can get free credits to start your journey.


![How to Master Photorealistic Architectural Rendering [Key Insights]](http://static.rayvision.com/media/56_Realistic_architectural_rendering_definition_guide_and_tips_866c1aac41.png?w=1000&fm=webp&q=100)