CG Photorealistic humans look great until you have to create your own human character in Blender, you have to learn a lot of things, and animating it is another challenge, but in this article, I will tell my workflow of getting photorealistic humans in Blender and animating them using Daz and some other tools.

The best part is that I have mentioned free alternatives of every add-on and plug-in I have used to make it easy for you guys to test it out.
Requirements
- First of all, you will need the latest Blender version: https://www.blender.org/
- You will need Daz Studio, which is completely free: https://www.daz3d.com/get_studio
- You will also need Daz to Blender Bridge: https://www.daz3d.com/daz-to-blender-bridge
- For skin, you will need the global skin or humanify add-on, and you will need 3D hair brush add-on for hair: 3D Hair Brush, Humanify or Global Skin
Daz Setup
Let's set up the Daz Studio first.

- Go to the Daz website and sign up, it's completely free.
- Download and install it.
- Open Daz Central and download Daz Studio.
- Search for Blender Daz Bridge and download it.

Blender Setup
Let's set up Blender.
- Go to the Blender website and download the latest release. You can also install it from the Microsoft Store or Steam. You can use the old versions by going into releases and downloading the portable version.
- To install an add-on, go into preferences, go in the addon tab and click “install from local”
Character Design
Let's start by creating the character.
- Open Daz and skip the intro menu.
- Go into the content library.

- Go under “Daz Studio Formats > My Daz 3d Library > People > Genesis 9 > Character.
- Make sure you are under Genesis 9 because those are the most realistic ones.
- I would recommend you to add “Matt for Genesis 9”, which will give you basic eyebrows and facial hair by default.
- Select the character and select “All” in the parameters tab, you can search for head and body morphs and play with the slider to get a shape that you want.

- You can also change the eye color, go into the smart content and search eyes. Select the one you like, you can do the same for the eyebrows, make sure you are changing the material.

Note: Don't add hair in Daz, it does not work correctly. We will add hair later in Blender with an add-on.
Export from Daz
let's export it to Blender.
- First, make sure to save the Daz file so you can change the character settings later.
- To export it, go into file (top left corner), click “send to” and select “Daz to Blender”.

- A new menu will pop up, check “advanced settings” and change the Blender "plugin installation" option to custom. Click install plug-in, it will ask for Blender location, select the version, go into scripts, addon and click okay.

- If you get any other message here, make sure that you selected the correct file path.

- Click export and you are good to go.
Import To Blender
In Blender, open the tool panel with “N” and find the Daz tab.
If you do not find it here, go into preferences and search Daz to make sure it's checked.
- Open the Daz tab, scroll down, and uncheck the scene settings under the Import tab.
- Now, click Import and you will get your character in Blender fully rigged and ready to use.

Skin:
The default Daz skin is not that good, so it is better to use an external add-on like Humanify or Global Skin to add some realistic details.

- Install the addon from preferences. You can get the addon from here: Humanify or Global Skin
- Open the side bar with “N” and find the addon.
- Open Humanify or Global Skin panel.
- Just select the mesh.
- Select the skin you want and click Apply Skin Shader.
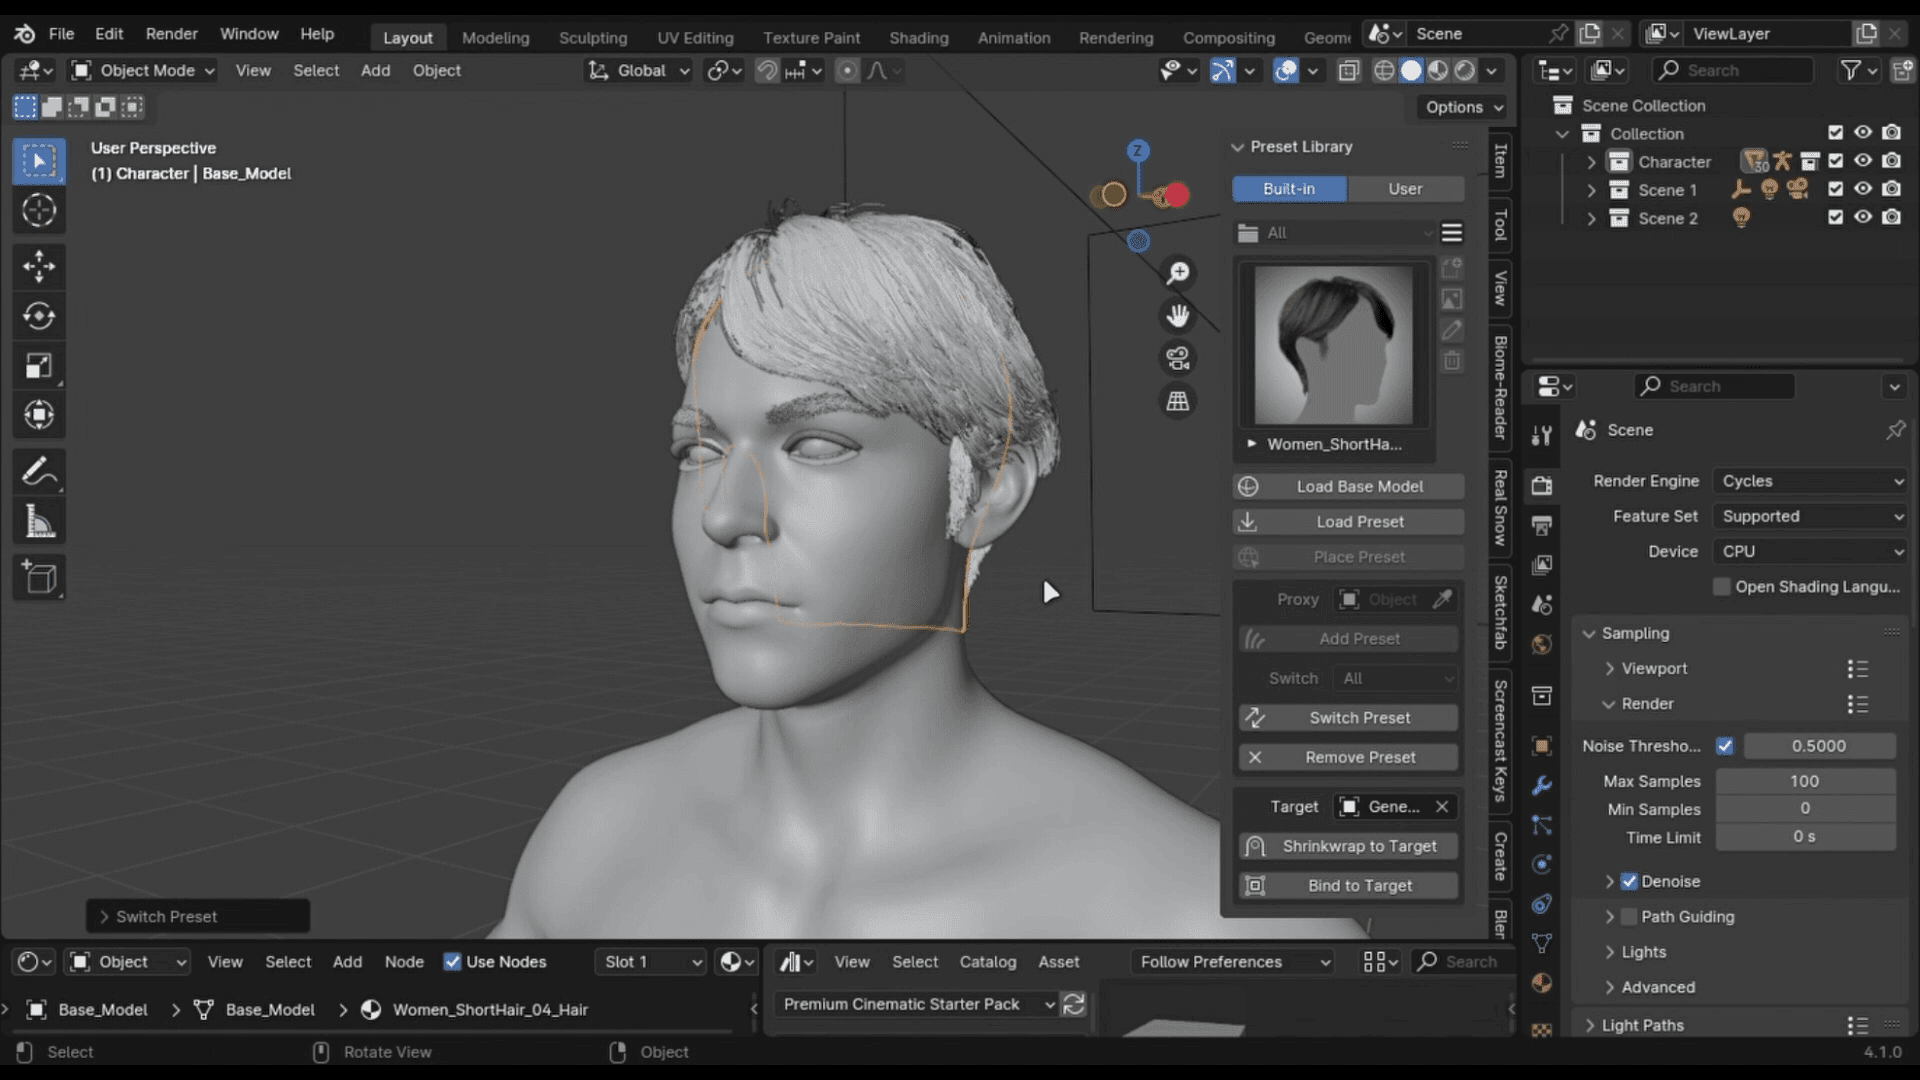
Hair:
The default Daz hair does not get imported in Blender and to fix it, you can use the free version of the 3d hair brush add-on, which contains 4 free hair presets and it's pretty easy to use.
- Install the addon from preferences. You can get the addon from here: 3D Hair Brush
- Open the side bar menu with “N” and find the addon.
- Click the “Load Base” button and you will get this hat type thing.

- Try to match it with your character head and when you are done, select your character head in the target drop box and click the shrinkwrap button.
- Now just choose which preset you want and click the “switch preset” button.
- You can bind it with your character head, go into pose mode, select the headbone and select the hair with shift, press “Ctrl + p” to parent with the bone.

I hope this article will help you create the best photorealistic CG human in Blender without sculpting, and when you are done creating it, try the best cloud rendering service Fox Renderfarm to render your character in high quality faster than ever.
You can get free credits to start your journey.


![Uncovering Best 5 Interior Design Rendering Software [Updated List]](http://static.rayvision.com/media/37_The_5_best_interior_design_rendering_programs_in_2025_273f28cfd0.png?w=1000&fm=webp&q=100)